It is important to note the importance that DRLs hold and the significance that they have in an automotive. The way they accentuate the position and movement of the vehicle on road, cautioning the pedestrians and animals well in time, makes them a desirable auxiliary. The installation of DRLs is quick and DIY, which has been explained here.
A DRL is a blessing for all cars since it makes the drive safe and smooth, it can make your car look stylish, vibrant, dazzling and make it easily identifiable in the dark hours and blind spot in the day. This is the basic function of a daytime running light kit, and that is how they have evolved, beginning from Scandinavian countries like Norway, Hungary, Denmark, Sweden, etc. in the late 20th century. With time, it has proved to be of great utility and a phenomenon that helped to reduce the rate of accidents.

Gradually it was set by default installed in all cars in the polar countries and now it can be seen that many cars like Sedans and SUVs come installed with the daytime running lamp all across the globe. However, for other smaller cars, you can get it installed from a good accessory shop nearby you, and for the people who believe in DIY, it will be a fun task to do. Let’s check out the step by step guide to know the installation process of the DRLs:
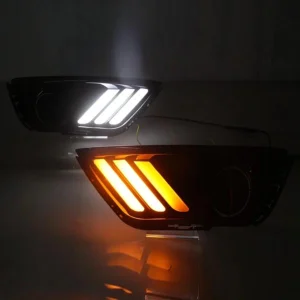
- Remove Protective film and paste it on the car
The adhesive cover has to be removed from the strip and then the strip has to be pasted on the edge of the headlights. This can be done easily while watching the video which has been uploaded on the website.
- It is the time to tuck the wires to the connectors
Opening the bonnet, the black wire has to be connected to the negative pole and the red wire has to be connected to the positive pole of the battery.
This is like placing the wires at the most appropriate points without any fuss on ‘how to do it’. It is easy to identify and a better judgment can be made by looking at the video and going through the booklet for daytime running light installation instructions.

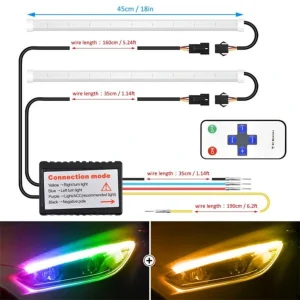
- Slice cut one wire from the left and one from the right signal
Take a wire cutter and slice-cut one wire from the left side headlight and connect the blue wire there, similarly, the process has to be repeated on the right headlight too, this one with the yellow wire. This will light up the daytime running light gorgeously as soon as you start the engine, the result will be magical and out of this world.

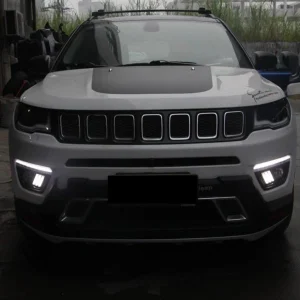
That’s how the lights can be assembled without troubling you to alter your day’s schedule and proves this process to be a complete DIY scenario. The installation will be worth doing because the result will be a chic surprise for the onlookers and will fetch you so many compliments. Moreover, when you get this installed, you know that it is an asset you are investing in and it is an auxiliary which you can count upon for the years to come.